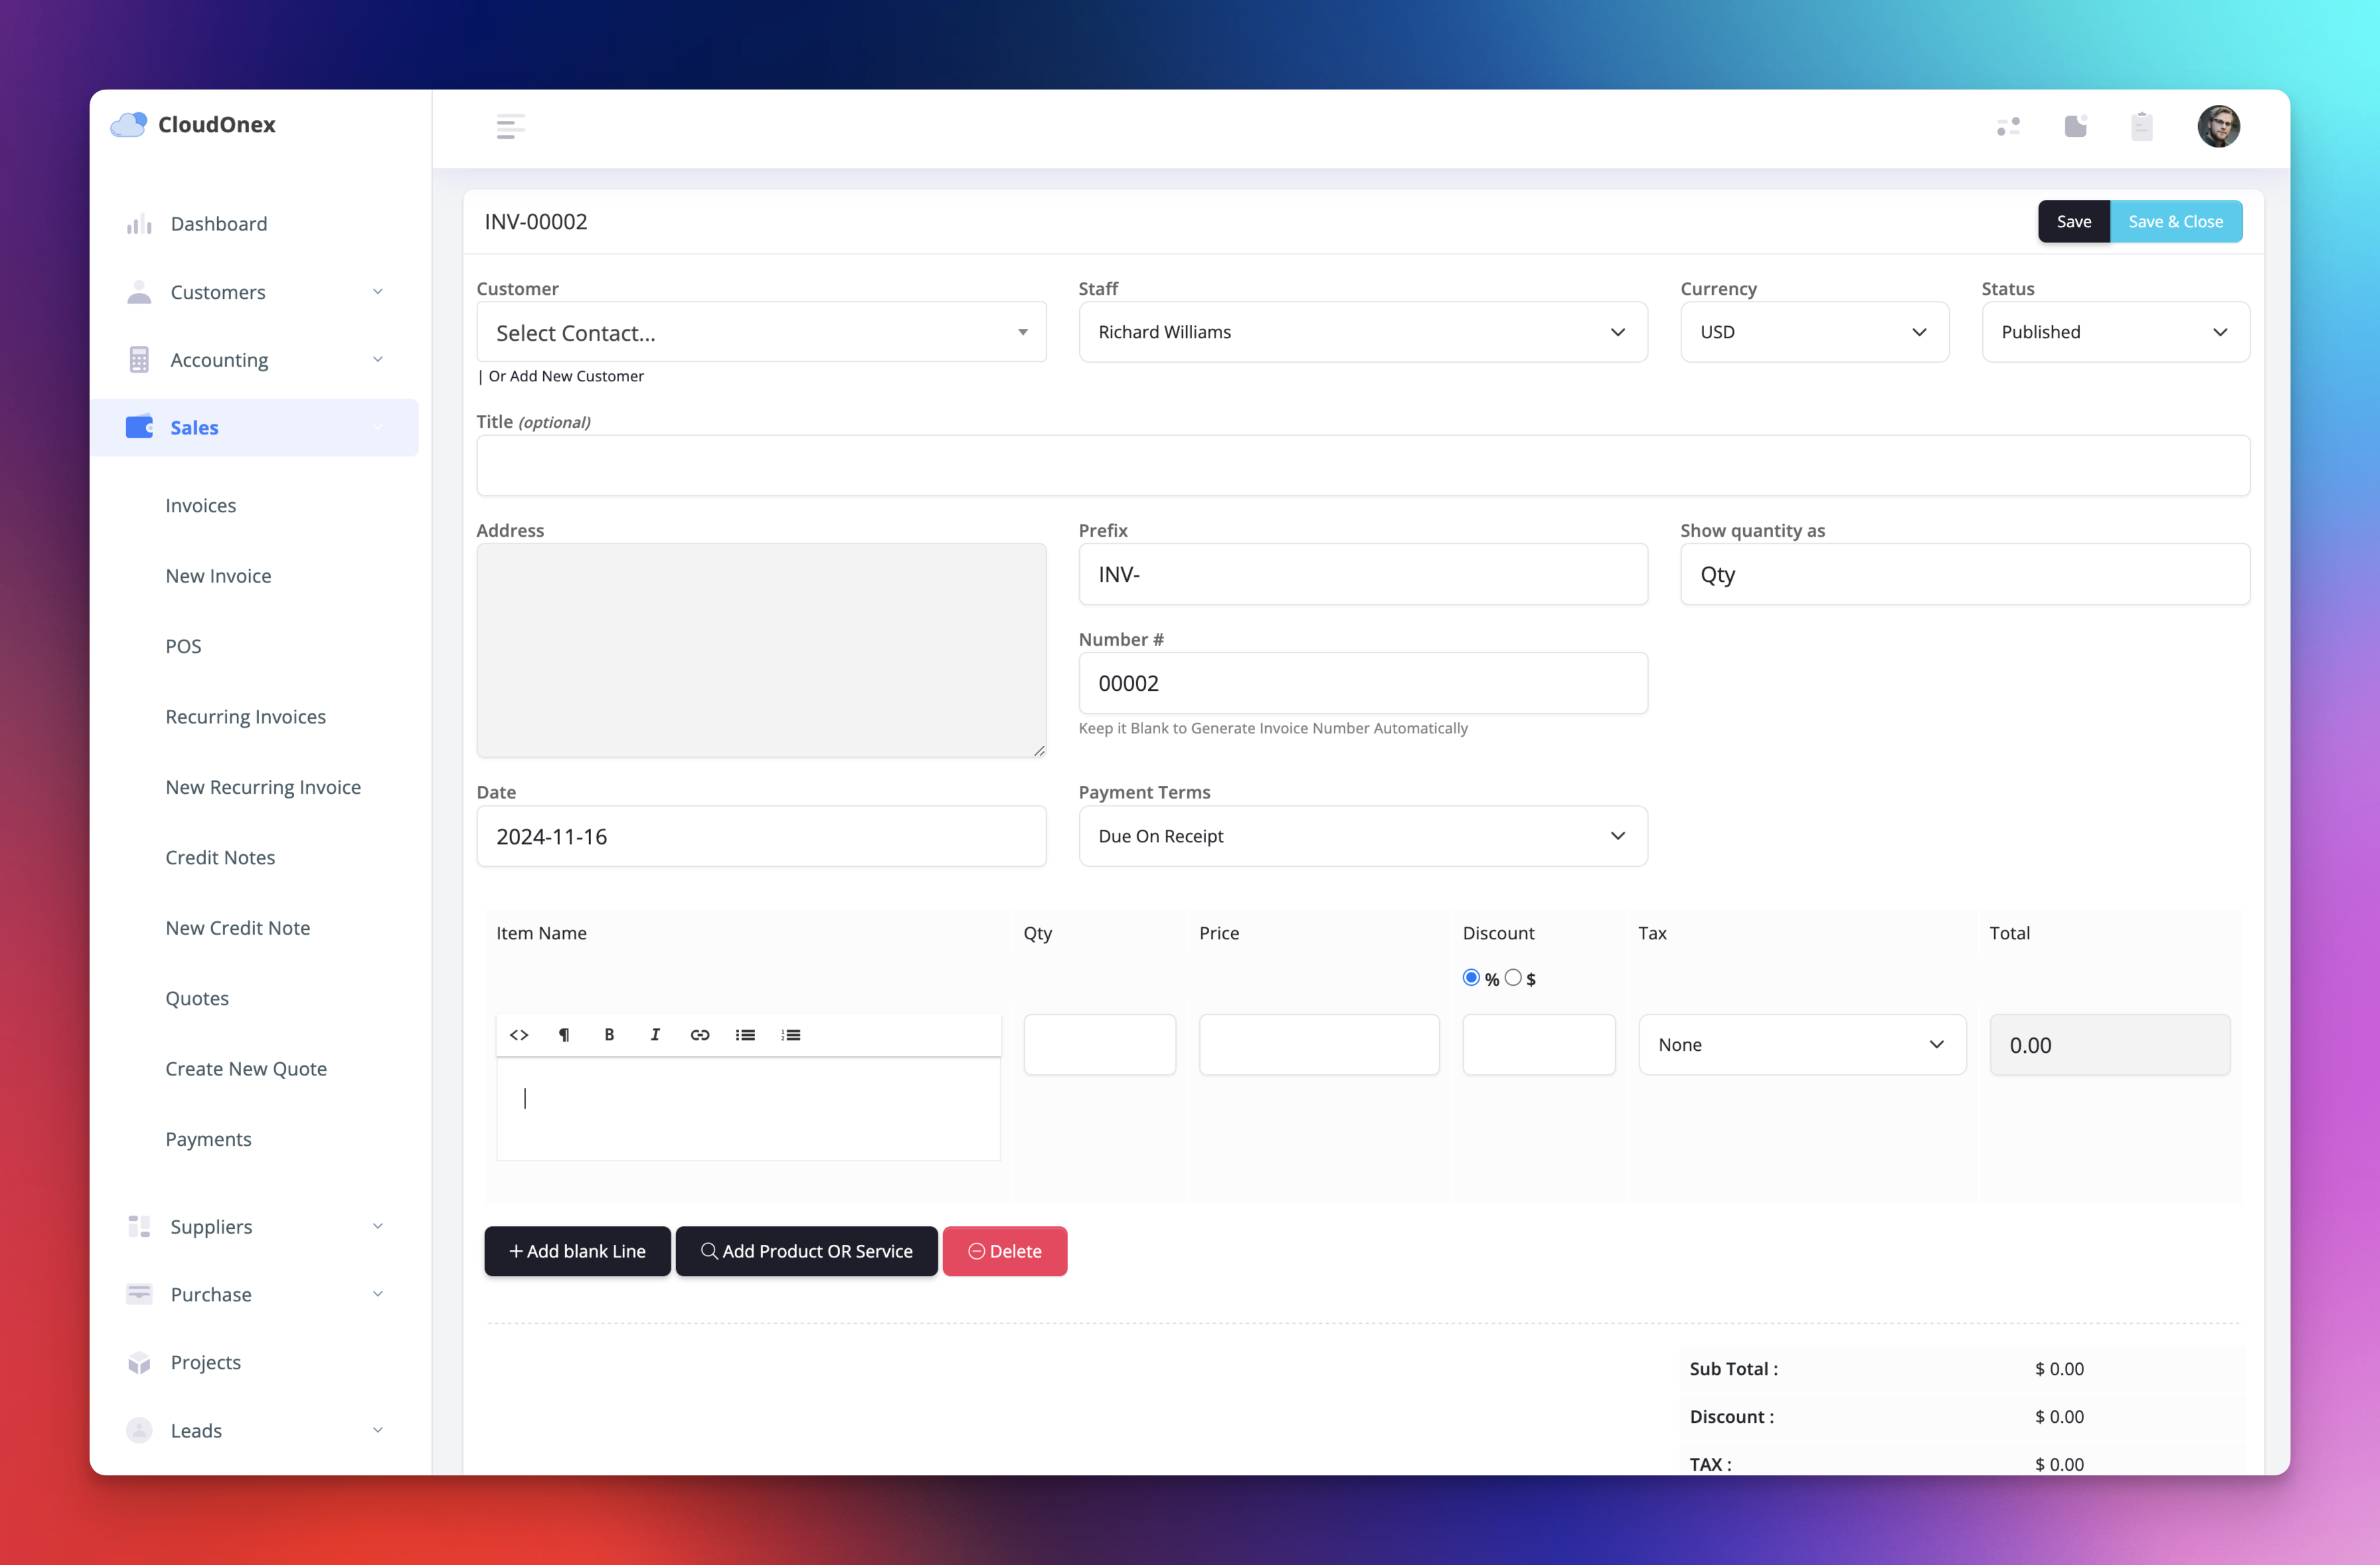
Creating an Invoice
Overview
CloudOnex Business Suite provides a comprehensive invoicing system that helps you create professional invoices efficiently. This guide will walk you through the process of creating and managing invoices for your customers.
Creating a New Invoice
Basic Steps
- Navigate to Sales → New Invoice
- Fill in the required information:
- Select customer
- Choose invoice date
- Set due date
- Add items
- Apply taxes (if applicable)
- Add terms and notes

Invoice Details Configuration
Customer Selection
- Choose existing customer from dropdown
- Or click "Add New Customer" to create new
- Verify billing information
- Confirm shipping address (if different)
Invoice Numbering
- Automatic sequential numbering
- Custom prefix options
- Manual number override
- Date-based numbering available
Adding Items to Invoice
Item Entry
- Click "Add Item" button
- Enter:
- Item description
- Quantity
- Unit price
- Tax rate (if applicable)
- Discount (if applicable)
Item Management
- Select from product catalog
- Add custom items
- Apply bulk discounts
- Set item-specific taxes
- Add item notes
Price Calculations
Automatic Calculations
- Subtotal
- Tax amounts
- Discounts
- Total amount
- Balance due
Tax Configuration
- Select applicable tax rates
- Multiple tax levels available
- Tax exemption options
- Compound tax calculations
Customization Options
Invoice Appearance
- Choose template design
- Add company logo
- Select color scheme
- Customize field labels
Additional Fields
- Purchase order number
- Project reference
- Sales representative
- Department codes
- Custom fields
Payment Terms
Setting Payment Terms
- Due date selection
- On receipt
- Net 15/30/60
- Custom terms
- Early payment discounts
- Late payment penalties
- Partial payment options
Payment Instructions
- Add bank details
- Include payment methods
- Specify payment conditions
- Set currency options
Invoice Preview and Sending
Preview Options
- Screen preview
- PDF preview
- Print preview
- Mobile view
Sending Methods
- Email directly to customer
- Download as PDF
- Print hard copy
- Share via customer portal
Recurring Invoices
Setup Process
- Check "Make Recurring" option
- Set frequency:
- Daily
- Weekly
- Monthly
- Custom interval
- Define start and end dates
- Set auto-send options
Managing Recurring Invoices
- View upcoming schedules
- Edit recurring settings
- Pause/resume series
- Cancel recurrence
Invoice Status Management
Available Statuses
- Draft
- Sent
- Viewed
- Paid
- Partially Paid
- Overdue
- Cancelled
- Void
Status Updates
- Automatic updates
- Manual status changes
- Payment status tracking
- Overdue notifications
Document Attachments
Adding Attachments
- Click "Add Attachment"
- You may add related files for example:
- Supporting documents
- Delivery notes
- Purchase orders
- Contracts
